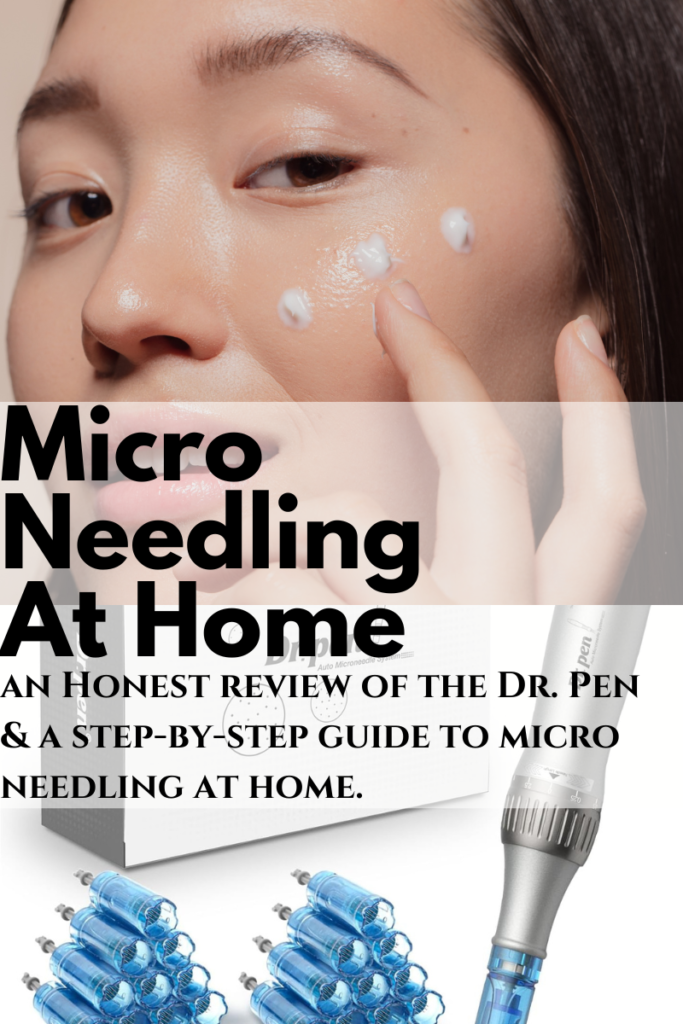
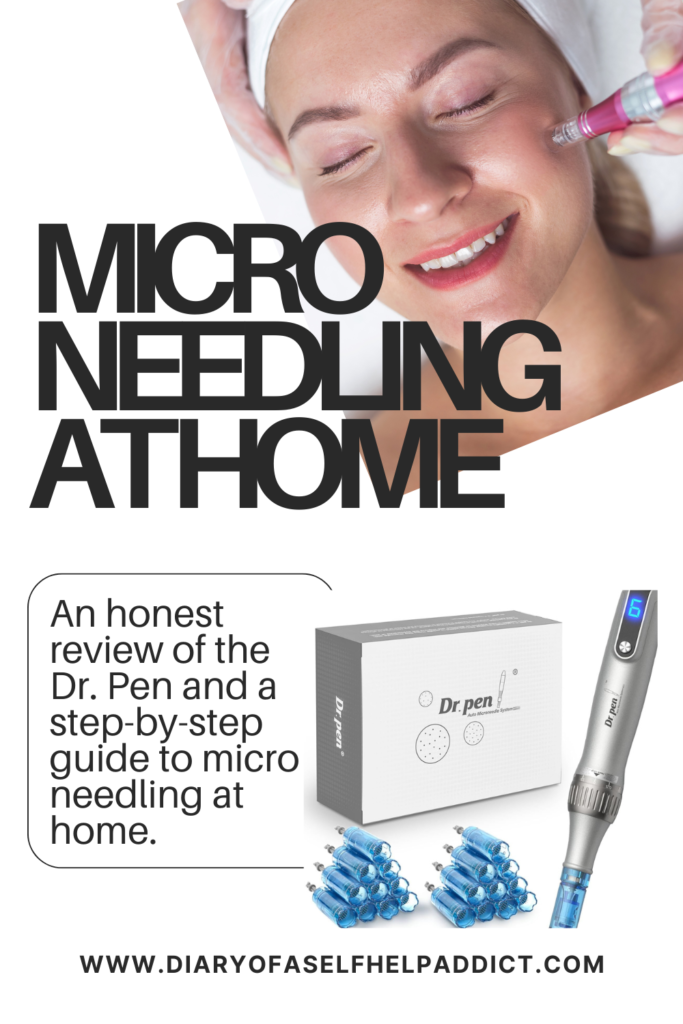
Discover the benefits of microneedling at home with Dr. Pen. Read about my personal experience and learn how to unlock the key to achieving youthful and rejuvenated skin. In addition, I share some of my favorite products that I use when microneedling, plus a step-by-step guide on how to do this treatment at home. Ooh and don’t miss my special discount code at the end of this post!
As an Amazon Associate and Dr. Pen Affiliate, I earn from qualifying purchases. Read my discloser here. This information is not medical advice, but for educational purposes only. Please consult a healthcare provider before performing any DIY at-home skin care procedures.
Before I share my experience with the Dr. Pen, let’s discuss what microneedling is and who can benefit from it.
What is microneedling?
Microneedling (MN) is a minimally invasive procedure that uses thin needles to make tiny holes in the top layer of the skin. This stimulates the body’s natural healing process to produce more collagen and elastin, which in turn helps the skin have a more youthful appearance. MN can be performed on many areas of the body; however, it is most commonly used on the face, neck, and chest.
Depending on the depth of the needles, MN can improve the appearance of aging or damaged skin, including acne scars, fine lines, wrinkles, and hyperpigmentation.
Who can benefit from microneedling?
There are cosmetic and medical uses for MN. In my understanding, the difference is in the depth. Here is a list of cosmetic concerns for which someone might do microneedling:
- Enlarged pores
- Fine lines and wrinkles
- Discoloration or hyperpigmentation
- Mild scars
- Stretch marks
- The need to deliver serums or medications into the skin
A couple of the medical issues whereby someone may get MN treatments are:
- Alopecia – hair loss due to autoimmune disorders.
- Hyperhidrosis – a medical condition whereby a person sweats excessively.

Who should avoid microneedling at home?
As always, consult your doctor before doing this or other cosmetic or medical procedures. Here’s a list of potential contraindications to MN, especially at home.
- Severe acne.
- Using prescription acne medications.
- Blood disorders.
- Using anticoagulant drugs, including frequent use of NSAIDS.
- Cancer or treatments for cancer, such as chemotherapy or radiation.
- Open sores, wounds, skin rashes, cold sores, blisters, or active infections.
- Skin conditions like eczema or psoriasis.
- Some autoimmune disorders.
- History of keloiding whereby the skin forms hard, raised scars.
- Areas where moles and skin tags could tear or bleed.
Microneedling pen vs. derma roller
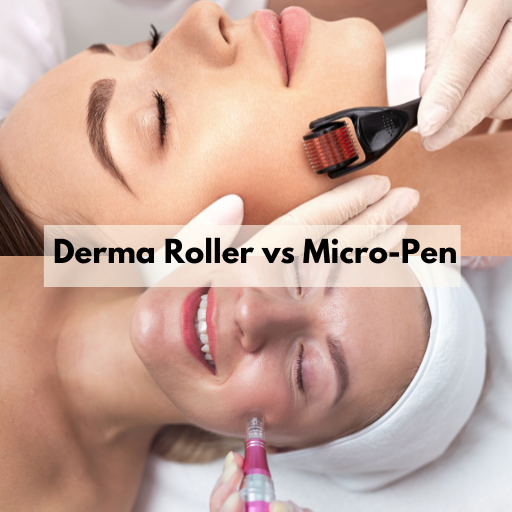
Currently, the most popular forms of microneedling devices are micro-pens and derma rollers or derma stamps. Derma rollers and stamps are commonly used at home, and microneedling pens are often used in a doctor’s office.
A derma roller is a multi-use device that has a roller covered in tiny needles. The user rolls the device across the skin, applying gentle pressure to create small punctures. Comparatively, a derma stamp has a flat head with stationary needles, so a stamping technique is used with this device. Since they are reusable, both devices must be sterilized after each use to avoid infection.
My favorite device for microneedling at home is a micro-pen. It’s a pen-like device that uses disposable pin-filled cartridges to create tiny punctures in the skin. Some brands of MN pens offer programable features, including speed, depth penetration, power, and cartridges with various pin sizes. Since the pin cartridge is disposable, there is no need to sterilize the device after using it.
There are potential risks with microneedling.
Although MN is a safe procedure, there are some potential risks, which include:
- Bruising
- Bleeding
- Swelling
- Blisters
- Scarring
- Infection
Is microneeding painful?
MN can be uncomfortable depending on the depth the pen is set to, but it should not be painful. A numbing cream can reduce the discomfort. Be sure to clean off the numbing cream thoroughly before MN to avoid having it enter the channels you create in the skin.
How long does it take to do a microneedling session at home?
An MN session can take 30 minutes or longer, depending on the area of coverage.
Is there downtime after microneedling?
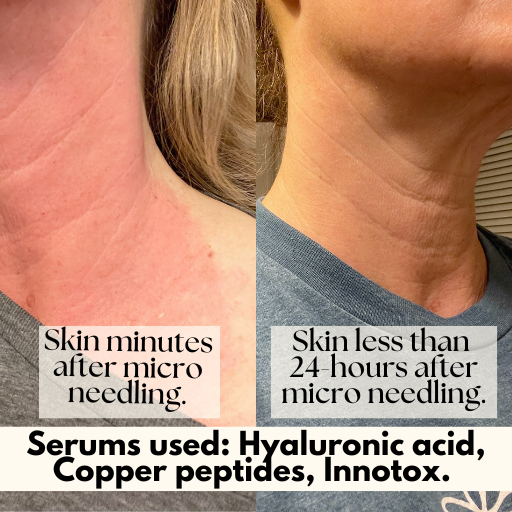
It’s common for your skin to be red and swollen, and you may even have areas of pin-point bleeding after MN. This should improve or resolve over 24-72 hours. Post-treatment, your skin may peel and feel tight for a couple of days, as if sunburned. You may apply specific serums and moisturizers to comfort and calm the skin, but avoid make-up or sweating, which can irritate it. Also, avoid direct sunlight for several days; however, wear SPF sunscreen if exposed to the sun.
To prevent further irritation, I avoid using retinol, vitamin C serums, or exfoliating scrubs for at least 72 hours after a microneedling session.
Below is a picture of my neck immediately after I micro-needled a couple of weeks ago. It felt like I had a bad sunburn, but the discomfort and redness improved significantly within 24 hours. My skin was back to its standard color by 48 hours, and it felt smooth and looked dewy and bright. I did have a small amount of peeling around my mouth and jaw, but I was hoping for more!
My honest review of the Dr. Pen.
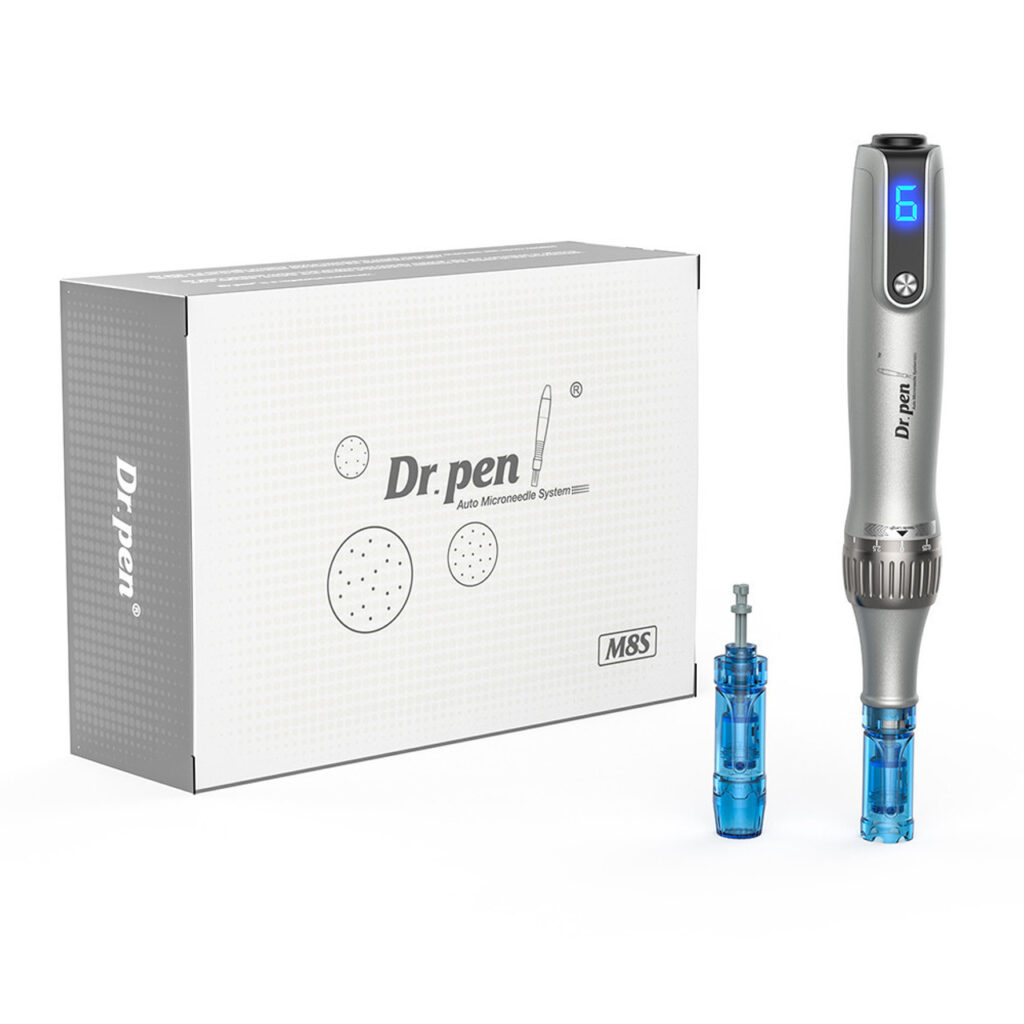
Finally, here’s my experience with the Dr. Pen. First, it’s affordable. I purchased it for about $100. With hundreds of 5-star reviews, I bought their model, the M8S. It is wireless and comes with a Type-C power cord. Furthermore, my device came with 20 replacement pin cartridges of various sizes and a quality box to store the pen and cartridges.
The pen is lightweight but durable and has a quality feel. Plus, it’s easy to set up and ready to use right out of the box since it comes partially charged. If your pen is not partially charged when it arrives, the power cord is long enough to plug it into the wall and use it while it’s charging.
My kit came with different-sized cartridges, including nano, 42-pin, 36-pin, 18-pin, and 12-pin. The cartridges are individually sealed for sterility and very easy to install – just be sure to have the pen set on “0” when you insert or remove the cartridge.
I love that the Dr. Pen pin depth setting can be adjusted from 0.25mm to 2.5mm. Additionally, it has six-speed settings, making it easy to fine-tune for different skin conditions and providing better results.
I especially appreciate that I can avoid spending big bucks at the aesthetician’s office and still get professional-looking results by microneedling at home.
This post contains affiliate links, so I earn a small commission at no extra cost to you. For the full privacy policy, click HERE.
Shop this post
I purchased my Dr. Pen from Amazon; however, a few months after I posted this blog, Amazon stopped selling the pens. I’m happy to announce that Dr. Pen Official has given me an affiliate link for my followers. Be sure to use KELLYDSHA at checkout for 20% off your order.
How often should I microneedle?
It’s recommended that cosmetic (less deep or irritating) microneedling be done once per week. However, medical microneedling, where you make deeper cuts and potentially have more swelling and irritated skin, should only be done once every 4 to 6 weeks.
My favorite skin care products to use when I microneedle.
By purchasing from my Amazon Associate and Dr. Pen links, you support my small business, and I am truly grateful. Thank you!
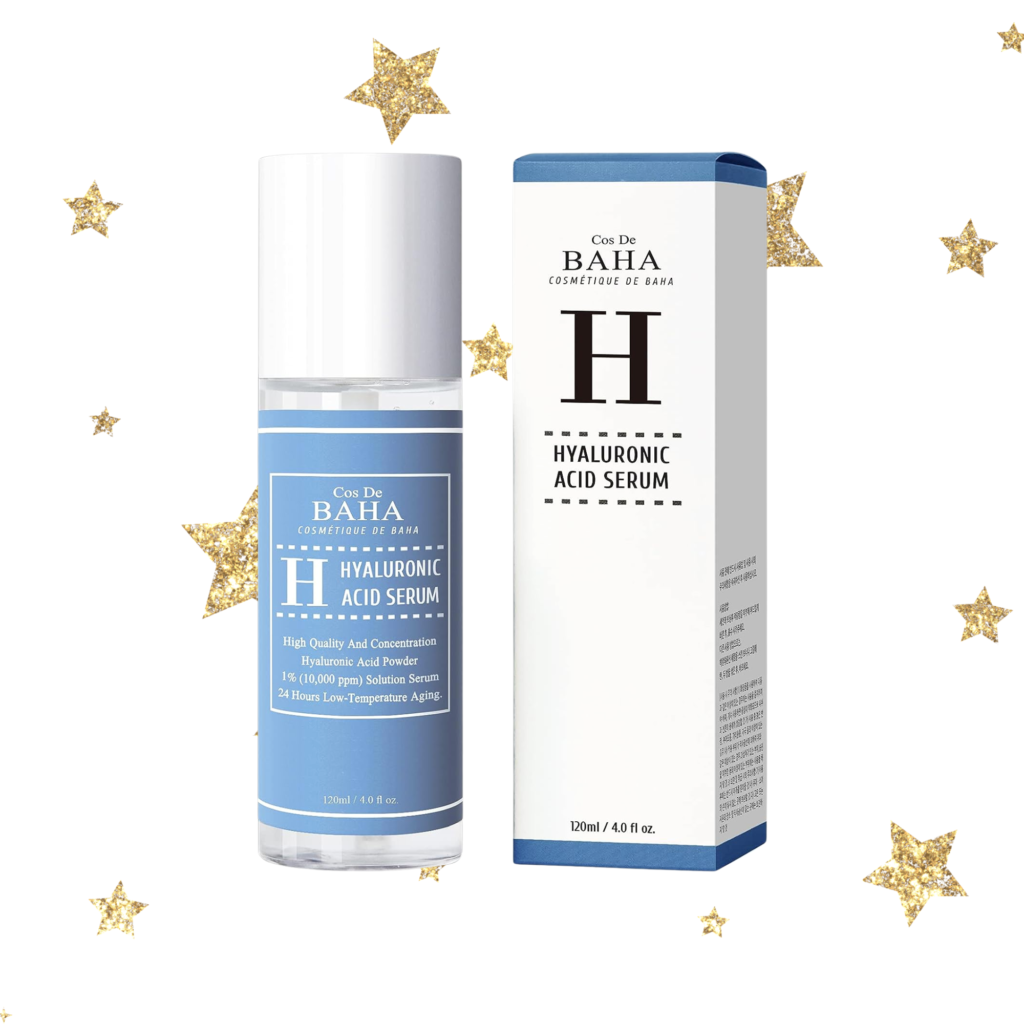
I love this Hyaluronic Acid serum by Cos De Baha for use before, during, and after microneedling. During my treatment, it helps the pen slip over my skin smoothly and adds extra hydration to the microchannels.
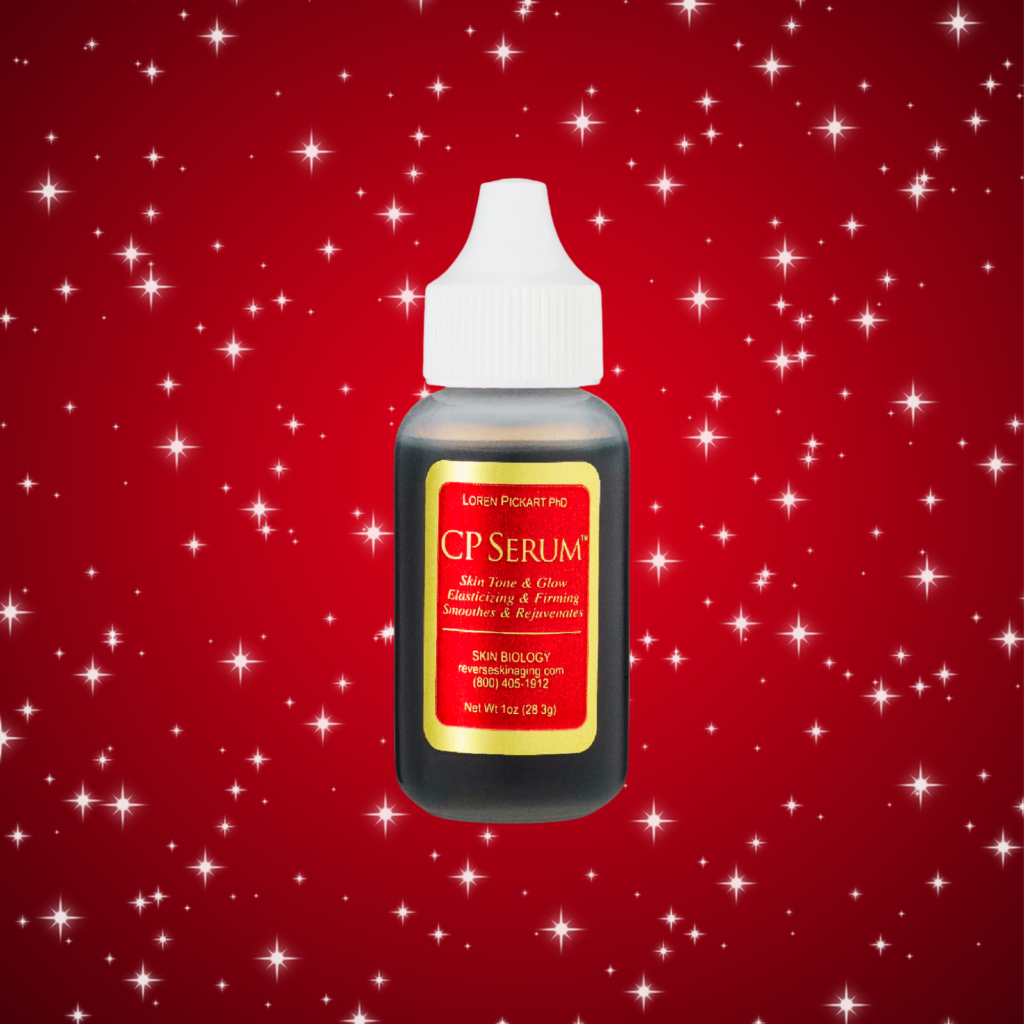
These Copper Peptides by Skin Biology are a must-have when microneedling. Copper peptides are often added to skin care serums for their firming effect on loose or wrinkled skin.
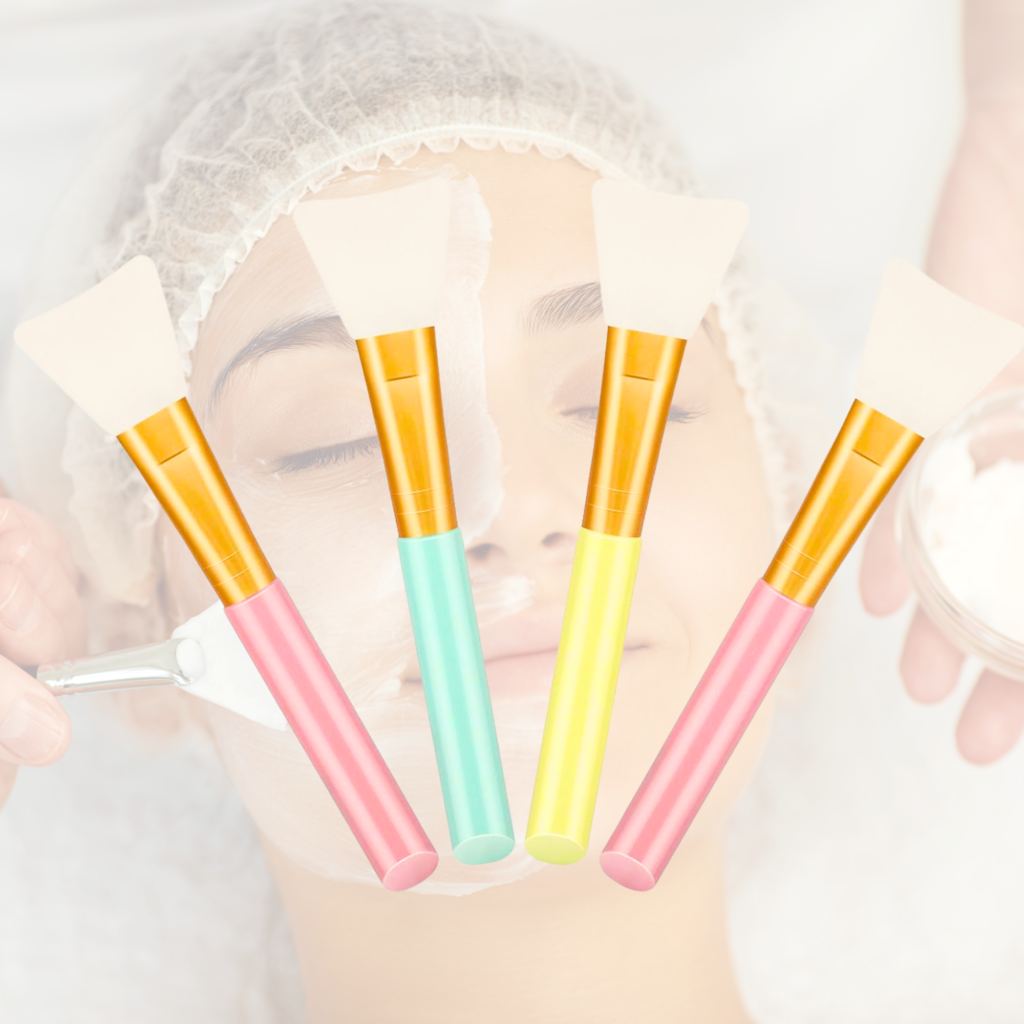
I use the silicone brushes to apply the serums to my face before, during, and after the session. I do not recommend using bristle brushes to apply serums because much of the product is wasted in the brush.
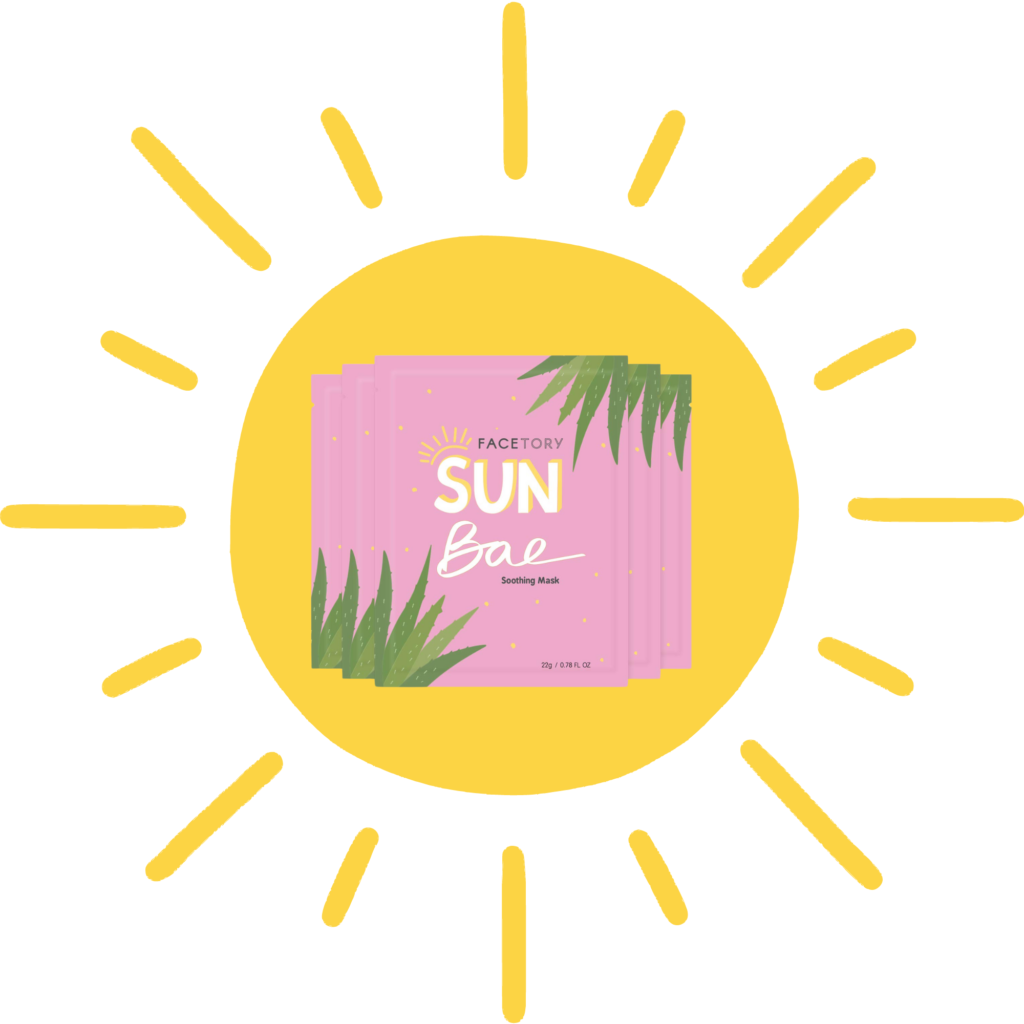
It’s refreshing to use these Sun Bae Face Sheet Masks by Facetory after microneedling. The aloe helps soothe, calm, and hydrate the skin.
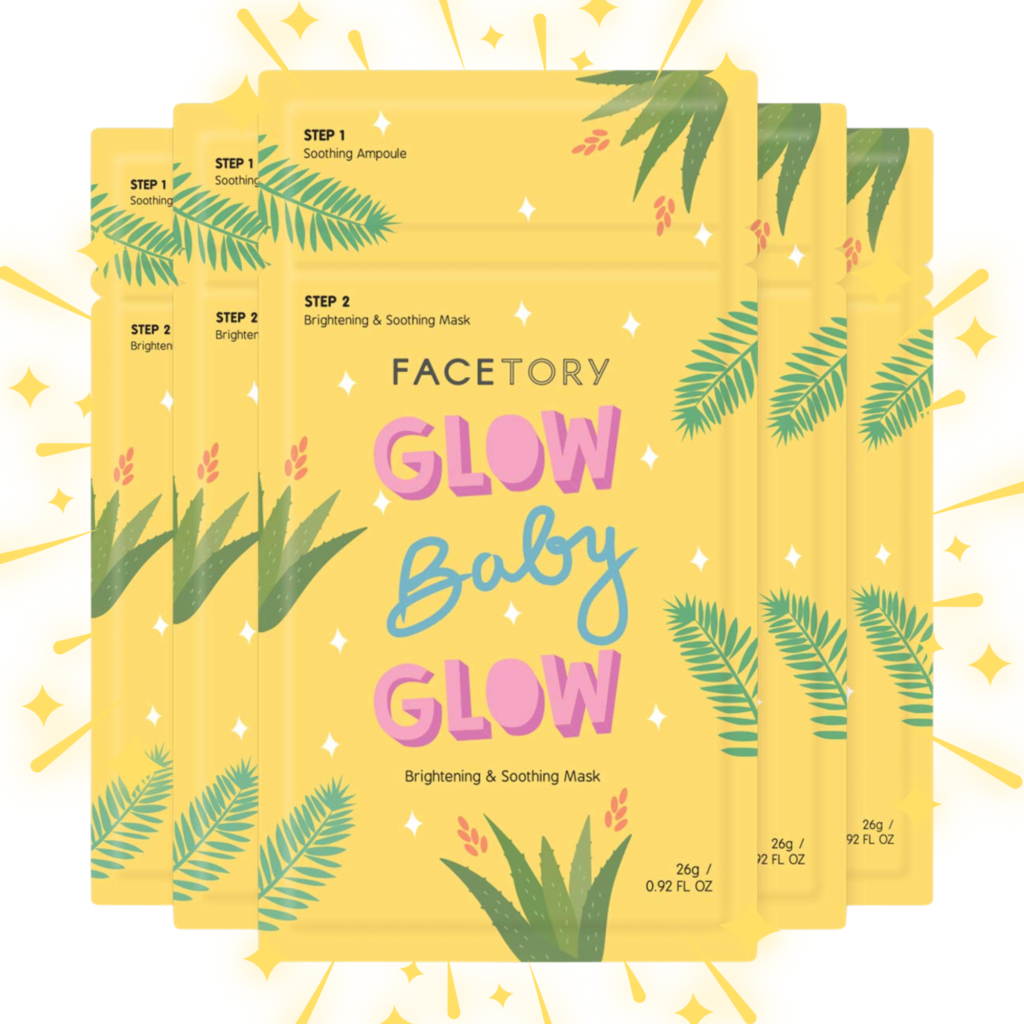
Here’s another excellent face sheet mask by Facetory- Their Glow Baby Glow mask with niacinamide, aloe, and flower extracts brightens, soothes, and moisturizes the skin.
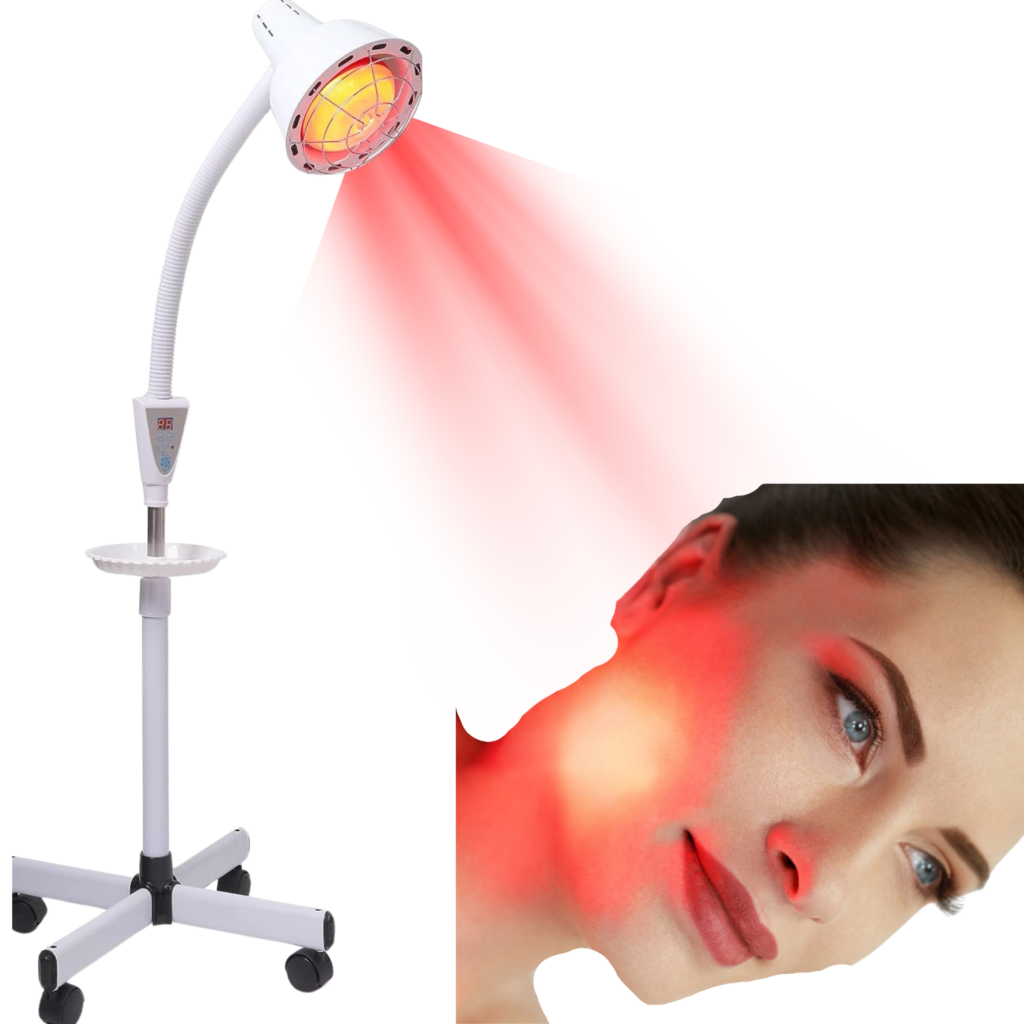
Lastly, red light therapy is an excellent treatment after microneedling. This lamp is one of my favorite purchases of 2022. I originally bought it on the recommendation of my doctor to help heal my incisions after surgery. I still use it almost daily to improve my skin, generalized inflammation, gut health, muscle soreness after workouts, and simply for the calming effect it gives me after a long day.
What depth and speed should I set my pen to?
The Dr. Pen website has much information you’ll need to get started, including pen instructions and speed and depth guides. The more pins in a cartridge, the less abrasive it will be so that the speed can be slightly higher, like a 4, 5, or 6. Conversely, if a cartridge has fewer pins the more punctures it will make in the skin, therefore a slower speed setting is best. As an illustration, if you step on a nail, it will likely go straight through your foot and cause much damage. However, if you step on a bed of nails, the surface area is such that it is less likely to do a lot of damage or even puncture the foot.
Stamping vs. Gliding Techniques
Experts recommend using a stamping versus gliding technique when microneedling to avoid dragging the pen and potentially causing damage to your skin. I must admit the stamping technique takes longer, and although it may be easier on the skin, I found I was too impatient to stamp the pen. I often start using the stamping method, especially in delicate or tender-skinned areas, but I usually end up gliding the pen most of the time. Make sure you apply plenty of serum to the skin before using the gliding technique so there’s plenty of slip.
Steps to microneedle at home with the Dr. Pen.
- Ensure your device is fully charged (or plugged in) before use.
- Set the pen on “0” and insert a new cartridge into the pen. Keep the cap on the tip of the cartridge until ready to use.
- Make sure your work area is clean.
- At your workstation, have a mirror, 90% rubbing alcohol, cotton pads, serums, a silicone brush, and a face sheet mask. I mix my serums in a clean shot glass that I’ve wiped with rubbing alcohol, but you can apply them individually. Make sure your serums are enclosed in sterile jars. Do not use products you scoop out with your finger, which can cause infection.
- Cleanse your face to remove dirt and oils which can cause infection.
- If using, apply numbing cream for 20-30 minutes. (optional)
- Remove the numbing cream and cleanse the treatment area again.
- Some may apply rubbing alcohol to their skin after cleansing to prevent infection. However, this can dry the skin and irritate the eyes, so be cautious.
- Press and hold the on-button on your Dr. Pen for 3 seconds until it turns on. You will feel it buzzing.
- Set the speed and depth.
- Remove the cartridge safety cover.
- Apply the serum to a small area where you plan to begin microneedling.
- Gently stamp or glide the pen over the area where you applied the serum.
- Work in a grid-like pattern to track the areas you’ve already passed over.
- Moving the pen in a vertical, horizontal, and then diagonal pattern, especially if you use the stamping technique, is recommended to ensure that you cover the entire area.
- If the skin becomes dry, apply more serum.
- When you complete a section, apply more serum to that area, and in the next portion, you plan to microneedle.
- Continue until you have finished microneedling the areas you want to improve cosmetically. If you have serum left over, apply it liberally to the micro-needled skin.
- Lastly, apply a face sheet mask for 30 minutes.
- If you have a red light, you can use it while you wear the face mask for added healing benefits.
Comment below if you’d like to see more reviews like this. Also, let me know if you’ve used a Dr. Pen or other microneedling device.
Pin it for later
Articles referenced in this post.
https://my.clevelandclinic.org/health/treatments/23113-microneedling
I’ve been trying to work on my skin way more now that I’m 30. This was a good article as I just purchased a derm stamp! At least that’s what I think it’s called. Lol
Yay! I hope you like the derm stamp! I wish I knew about this when I was in my 30’s (now 51!).
Thank you for this article. I have always been so afraid to do anything more than cleanser and moisturizer on my face…haha. This was very informative and made it all a wee bit less scary so thank you!
Oh I’m addicted to the Dr. pen. Thank you, Kelly I love this and the serums you recommend. l talked with Kelly on the phone she told me what to do step by step. My face, neck and chest feel so refreshed. I started very mild 025 on depth and 3 on my speed as Kelly recommended. I’m slightly pink like a sun kissed look. I love this product and Kelly is awesome.
Barbara
Thank you, Barbara!! I love it too! Being able to do DIY skin care is so empowering and much more affordable! 🥰