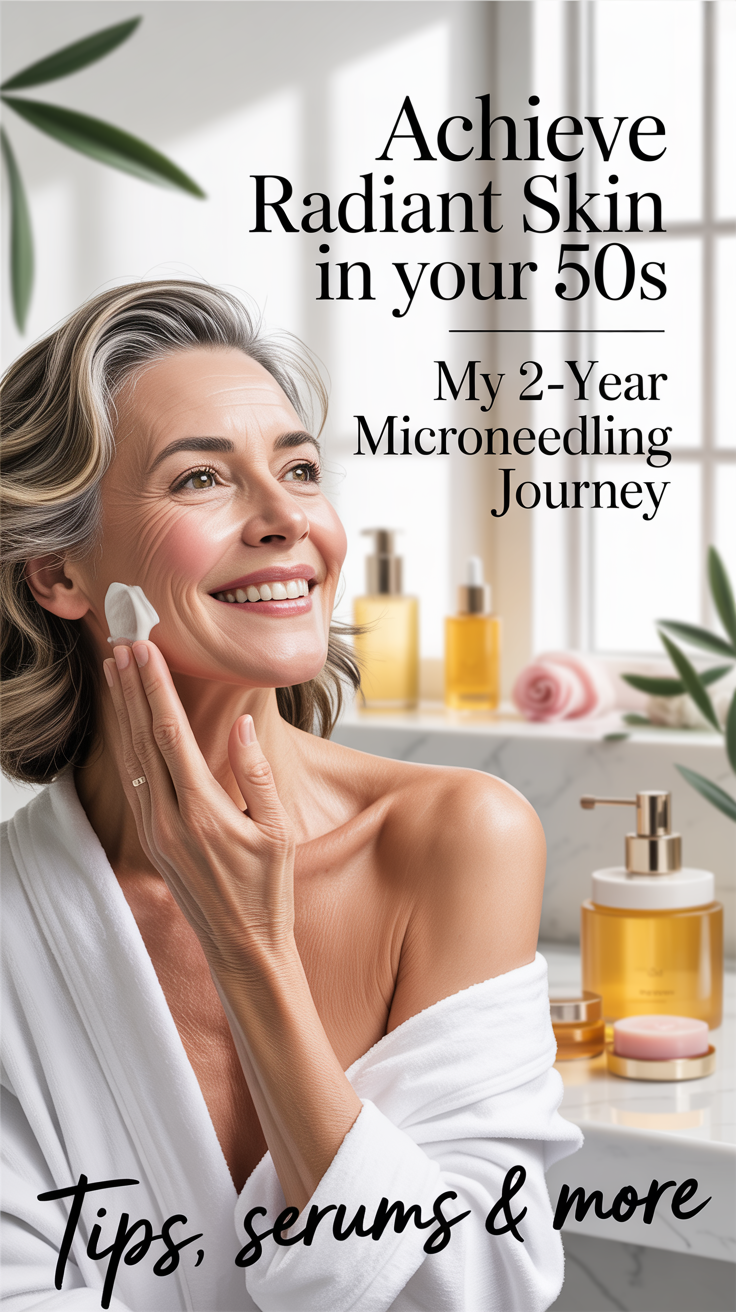
If you had told me a few years ago that I’d be sitting at home with tiny needles rolling across my face (and loving it), I would have laughed out loud. But here I am, nearly two years into microneedling my own skin, and I can honestly say it has been one of the best things I’ve ever done for myself.
At the age of 50, my skin was starting to tell the story of every smile, every late night, and every sun-soaked summer. And honestly, I was okay with that… I don’t mind aging. But what I wasn’t okay with was feeling like my skin didn’t reflect the energy I still felt inside. I wanted healthy, glowing, resilient skin, not dullness, fine lines, and a crepey texture that seemed to appear overnight.
Like so many of us, I started Googling. Professional treatments were an option, but the cost was jaw-dropping… hundreds (sometimes thousands) of dollars for a series of microneedling sessions at a clinic. And the kicker? You don’t stop after one round. To truly maintain results, you need to continue revisiting. For me, that just wasn’t realistic.
That’s when I stumbled across the idea of doing it myself at home. Honestly, I was skeptical at first. Could I really handle this on my own? Would it be safe? Would it actually work, or was it another skincare gimmick? But curiosity (and a little stubbornness) got the better of me. I ordered a device, did my research on safety and technique, and promised myself I’d give it a fair try.
Fast-forward nearly two years, and here’s the truth: I’m hooked. My skin looks healthier than it has in years. My makeup sits better, my pores look smaller, my fine lines are softened, and there’s this glow I thought I’d lost in my forties. Friends and clients often ask me what I’ve done differently, and when I tell them it’s microneedling at home, their jaws drop.
I get it… It sounds intimidating. However, once you understand the process, it becomes empowering. Instead of feeling at the mercy of pricey appointments and the clock ticking on my skin, I feel like I have this secret tool in my back pocket. It’s affordable, it’s doable, and it’s something I can fit into my schedule (usually with a cup of tea and Netflix).
Microneedling has become more than just a treatment for me… It’s become a little ritual of self-care, a reminder that aging gracefully doesn’t mean giving up on your skin. It means taking charge of it.
Medical Disclaimer: I am not a doctor. The information shared in this post is based on my personal experience with microneedling and is for educational and informational purposes only. It should not be taken as medical advice, diagnosis, or treatment. Always consult with a licensed healthcare provider or dermatologist before beginning any new skincare treatment, especially if you have a medical condition, take medications, or have concerns about your skin. Microneedling carries risks, including infection and scarring, if not performed properly. You are responsible for using this information at your own discretion and risk.
What Microneedling Actually Is (and Why It Works)
When people first hear the word microneedling, the reaction is usually the same: “Wait, you’re putting needles in your face… on purpose?!” 😅 It sounds intense, but the truth is, microneedling is one of the most effective (and surprisingly gentle) ways to trigger your skin’s natural repair process.
Here’s what’s really happening:
Microneedling uses a tool with dozens of tiny, sterile needles to create controlled micro-injuries in the skin. These “micro-channels” are so small that they heal quickly, but the magic lies in how your body responds to them. When your skin senses those tiny injuries, it kicks into repair mode, boosting collagen and elastin production, increasing cell turnover, and improving overall skin function.
Collagen and elastin are like the scaffolding of your skin. They keep it firm, bouncy, and smooth. However, as we age (especially after reaching our 40s and 50s), our collagen production naturally slows down. That’s why fine lines deepen, skin gets thinner, and things start to feel, well… less tight than they used to.
Microneedling essentially prompts your skin to appear younger. It says: “Hey, remember how you used to pump out all that collagen in your 20s? Let’s do some of that again.”
The Benefits of Microneedling
Research has shown that microneedling can help with:
- Fine lines and wrinkles – by stimulating collagen renewal
- Skin texture – smoothing out crepey or rough areas
- Pore size – making them appear smaller and tighter
- Hyperpigmentation and sun damage – encouraging fresh, even-toned skin
- Acne scars – softening the look of old marks
- Product absorption – those micro-channels allow serums (like hyaluronic acid or peptides) to sink deeper and work harder
For me, the two most significant changes were in texture and glow. My skin looks healthier, more luminous, and glowy. It’s not about looking 25 again; it’s about looking like the best version of myself right now.
Why This Is So Powerful in Your 40s, 50s, and Beyond
Once menopause hits, estrogen levels drop, and that takes a toll on skin. Estrogen actually plays a big role in collagen production and skin hydration. That’s why many women notice sudden changes around this time, such as sagging, dryness, and a dull appearance.
Microneedling is like giving your skin a workout. Just like lifting weights keeps muscles strong as you age, microneedling keeps your skin in a state of constant repair and renewal, known as “building mode.” Instead of passively accepting collagen loss, you’re actively encouraging your body to keep producing it.
And here’s the thing I love most: it’s your collagen. It’s not a filler, it’s not an implant, it’s not something artificial. It’s your skin, healing and regenerating itself.

Professional vs. At-Home Microneedling: What’s the Difference?
When I first started researching microneedling, one of my biggest questions was: “Should I pay for professional treatments or try this at home?” And honestly, the answer depends on your goals, skin type, and personal comfort level. But here’s what I’ve learned after nearly two years of doing it myself.
Professional Microneedling
At a dermatologist’s office or medspa, microneedling is typically performed using a medical-grade device called a “dermapen” or “skin pen.” These devices use needles that can go deeper (often up to 2.5 mm) and are operated by trained professionals.
Pros:
- Stronger results in fewer sessions (especially for deeper acne scars or significant wrinkles)
- Often combined with advanced treatments like radiofrequency, platelet-rich plasma (PRP), or exosomes
- Performed in a sterile, controlled setting
Cons:
- Expensive: A single session can cost anywhere from $250 to $700, and most people need at least 3–6 sessions for real results
- Requires booking, traveling, and taking time out of your day
- Some downtime (redness, peeling) that may not be convenient if you have a busy schedule
At-Home Microneedling
At home, you use a dermaroller, dermastamp, or, my personal preference, a motorized microneedling pen, which typically features shorter needle lengths (usually between 0.25 mm and 2.0 mm). These are safe for personal use when done correctly, and they focus more on improving skin texture, tone, and product absorption rather than treating deep scars.
Pros:
- Affordable: Once you buy the device, your ongoing cost is just replacement cartridges/rollers and your serums, saving literally thousands of dollars a year
- Convenient: I can do a session in my own bathroom while watching Netflix, on my own schedule
- Consistent: Instead of “hoping” I’ll keep up with professional appointments, I can regularly fit microneedling into my skincare routine
- Effective: Amazing for maintenance, glow, and long-term collagen support
Cons:
- Results are more gradual compared to professional treatments (think steady progress vs. a big jump)
- Requires discipline; cleaning, sanitizing, and doing the aftercare correctly
- You need to be careful not to overdo it (yes, I’ve learned that one the hard way 🙃)
For me, the choice was easy. The thought of spending thousands of dollars a year wasn’t realistic, and I loved the idea of being able to take control of my own skin at home. Additionally, I genuinely enjoy the ritual; it has become an integral part of my self-care routine.
I always tell friends and clients that professional microneedling is terrific, especially if you can afford it or if you’re dealing with something more advanced, like deep scarring. However, for everyday aging concerns such as fine lines, dullness, and crepey texture, an at-home routine can be incredibly effective.
My Personal 2-Year Microneedling Journey
When I started microneedling at home, I promised myself I’d give it at least a few months before deciding whether it was worth it. What I didn’t expect was how quickly I’d start noticing changes, and how those small shifts would build into real, lasting transformation over time. Here’s how it unfolded for me:
The First Month: Testing the Waters
That first session? I was nervous. The thought of stamping tiny needles across my face was intimidating, but once I actually did it, I realized it wasn’t nearly as scary as I’d built it up to be. Yes, my skin was red and a little tender right after, but it calmed down within 24 hours.
By the end of the first few weeks, I noticed something subtle but exciting: my skin seemed to “drink up” my serums in a way it hadn’t before. Products I’d been using for years suddenly felt more effective. My skin looked a little fresher and more hydrated, with a new glow peeking through.
3–6 Months: The Real Glow Kicks In
Around the 3-month mark, I started noticing bigger shifts. My skin tone looked more even, my pores seemed smaller, and my fine lines, especially around my mouth and eyes, were softer.
By 6 months, friends started commenting: “Your skin looks amazing, what are you doing differently?” That was such a validating moment. I wasn’t chasing perfection, but to have people notice the glow I was feeling on the inside showing up on the outside was huge.
1 Year: Confidence Boost
At the one-year mark, microneedling didn’t feel like an “experiment” anymore; it had become part of my lifestyle. The improvements were undeniable:
- My skin felt firmer and thicker (no more paper-thin, crepey texture on face or neck)
- Makeup applied so much more smoothly, I actually needed less of it
- That dull, tired look I used to have? Gone.
There were also lessons learned: I discovered the importance of spacing out treatments (overdoing it doesn’t equal faster results), and I dialed in which serums worked best for me during and after microneedling.
2 Years: Why I’ll Never Stop
Now, nearly two years in, I can confidently say microneedling has been one of the best skincare choices I’ve ever made. My results have been gradual, natural, and consistent, which honestly feels better than chasing quick fixes.
The most significant difference isn’t just in my skin, though… It’s in my confidence. I love that I can look in the mirror and see healthy, radiant skin that reflects how I feel inside. And I love knowing that I did this for myself, in my own home, without breaking the bank.
It feels like a gift I’ve given myself: not just younger-looking skin, but control over the way I age.
My Step-by-Step At-Home Microneedling Process
Whenever I share that I microneedle at home, the very next thing people ask is: “Okay… but how exactly do you do it?”So here’s my honest, step-by-step routine.
I’m not a doctor (just a skincare-obsessed woman in her 50s who’s tried it all!), but this is what’s been working for me consistently over the past two years.
1. Prep is Everything
The #1 rule with microneedling is cleanliness. Since we’re creating tiny channels in the skin, you don’t want any bacteria getting in there. So I always:
- Wash my face thoroughly with a gentle cleanser
- Pat it completely dry
- Sanitize my device with 70% isopropyl alcohol (so important, especially if you’re using a reusable roller or stamp!)
- Use serums that are enclosed in sterile containers
If I’m going for a deeper session, I’ll sometimes use a numbing cream for comfort, but honestly, most of the time I skip it. The sensation is more akin to a spicy vibration than actual pain.
2. The Microneedling Session
I use a microneedling pen (I find it more precise and more sterile than a roller), usually with a needle depth between 0.5–1.0 mm for my face. That’s enough to stimulate collagen without going too aggressively. I like using a pen since the cartridges are single-use, which significantly reduces the risk of infection.
Here’s how I do it:
- Work in small sections (forehead, cheeks, chin, neck, chest)
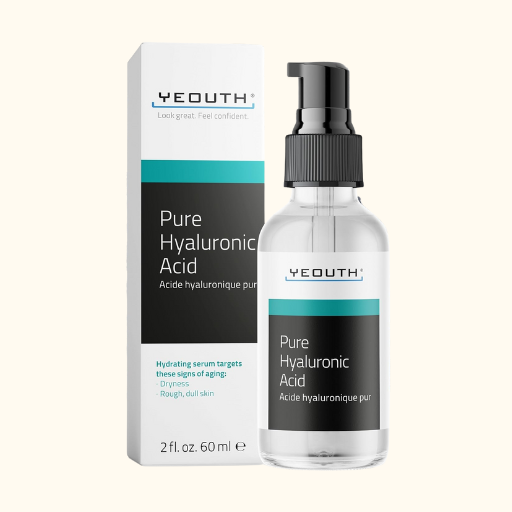
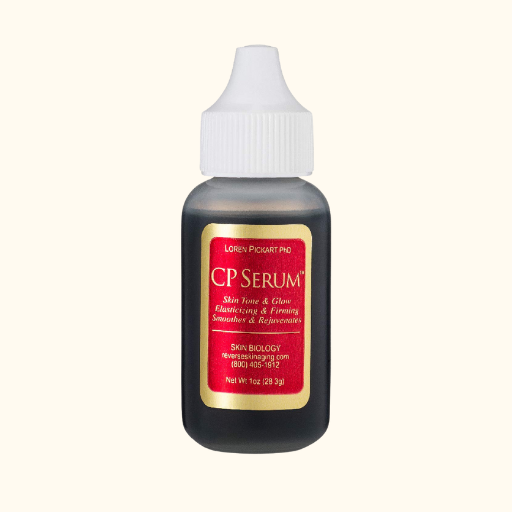
- Apply serums for slip, such as Hyaluronic acid, copper peptides & PDRN or exosomes (this is where the magic happens!).
- Move the pen in a criss-cross pattern (vertical, then horizontal) so I cover all areas evenly.
- Keep the pressure light; let the device do the work, not my hand
It usually takes me about 10–20 minutes to do my entire face, neck, and chest. My skin is pink afterward, almost like a very mild sunburn, which is precisely what I want.
3. Immediate Aftercare
Those tiny channels are open, which means my skin is primed to absorb whatever I apply during or immediately after microneedling. I always opt for gentle, healing products after microneedling, avoiding harsh actives like retinol or strong exfoliants.
My go-tos:
- Hyaluronic acid serum → for deep hydration
- Growth factors or peptides → to support repair
- A calming serum with aloe or centella if my skin feels sensitive
Afterwards, I sometimes apply a calming, cooling face sheet mask that also contains healing serums. I generally wait for a couple of hours, until the serums have soaked in (or not at all), to apply my nightly nourishing moisturizer. From time to time, I incorporate my red light mask to potentially accelerate the healing process, though there are varying professional opinions on its benefits after microneedling.
4. The Healing Timeline
Right after: my skin is pink and maybe a little warm.
Day 1–2: Depending on the depth I set the pen at, I may still feel a little flushed, but it quickly calms down. I keep things simple… hydration and sunscreen only.
Day 3–5: skin looks glowy, fresh, and sometimes I notice a bit of flakiness (a sign that old skin is shedding and new skin is coming through).
By the end of the week: hello, radiance!
5. Sun Protection is Non-Negotiable
This is huge. After microneedling, your skin is more sensitive to sun damage. I never skip a broad-spectrum, mineral-based sunscreen during the day, especially in the first few days after a session. It protects all that new collagen I just worked so hard to stimulate.
6. Frequency
When I first started, I microneedled about once a month for deeper treatments. These days, I’ve found a sweet spot of every 10-14 days with a shallower needle length. I especially love to do a lighter session the night before any event or special occasion, so my skin is glowy and dewy.
The Results: Before & After 2 Years
Looking back at where I started, the changes in my skin still surprise me. Two years ago, my skin felt dull, tired, and just… older than I felt inside. Fine lines around my eyes and mouth were becoming more noticeable, my pores looked larger, and I had that thin, crepey texture on my cheeks and neck that makeup only made worse.
Fast-forward to today, and here’s what I’ve noticed:
- Glow: My skin has that natural radiance again. People comment that I look “rested” or “fresh,” even on days when I’m not wearing a stitch of makeup.
- Texture: That crepey, paper-thin feeling? Gone. My skin feels firmer, thicker, and smoother to the touch.
- Fine Lines: Are They Completely Gone? No. But they’re softer, and they don’t catch the light in the same way anymore. My under-eye area and laugh lines, especially, look much better.
- Pores: They look smaller and tighter, especially around my nose and chin.
- Confidence: Honestly, this might be the most significant change of all. I love how my skin looks bare, and I no longer feel the need to hide behind heavy makeup.
What I love most is that my results look natural. I don’t look “done”; I look like the healthiest, best version of myself at 52. And for me, that’s everything.
Safety & Contraindications: When Microneedling Isn’t a Good Idea
As much as I love microneedling, it’s not for everyone. Since you’re actually creating tiny punctures in the skin, there are times when it’s best to wait or avoid it altogether.
You should avoid microneedling if you have:
- Active acne breakouts or cystic acne
- Rosacea, eczema, or psoriasis on the area you want to treat
- Open wounds, cuts, or active skin infections
- A history of keloid or raised scarring
- Are on certain medications (like Accutane/isotretinoin) that thin or compromise the skin
- Are pregnant or breastfeeding (always check with your doctor)
- Any blood-clotting disorders, or if you’re on blood-thinning medications
And one more biggie: hygiene is non-negotiable. Always use sterile cartridges or rollers, disinfect your tools, and never share devices.
When in doubt, talk to a dermatologist before starting, especially if you have underlying skin conditions.
Kelly’s Thoughts: Why I’ll Never Stop Microneedling
Two years ago, I never imagined that a little device with tiny needles would become such an essential part of my self-care routine. But here we are, and honestly, I can’t picture myself without it.
Microneedling has given me so much more than smoother skin. It’s given me confidence and control over how I age. It’s given me the freedom to care for my skin on my own terms, without feeling dependent on expensive treatments or waiting for someone else’s schedule to open up.
At 52, I don’t want to erase every line or pretend I’m 25 again; that’s not the goal. I like the story my face tells. But I also want my skin to reflect how I feel inside: vibrant, healthy, alive. Microneedling has helped me bridge that gap.
And the best part? It’s not about chasing perfection, it’s about supporting my skin in the most natural way possible. No heavy-duty procedures. Just my skin doing what it was designed to do: repair, renew, and glow.
If you’re in your 40s, 50s, or beyond and you’ve been feeling like your skin doesn’t quite match the energy you feel inside, I highly recommend microneedling. Whether you choose to do it professionally or in the comfort of your own home, as I do, the results are real, and the empowerment you feel is even more rewarding.
For me, this isn’t just a beauty treatment… It’s a blessing. And it’s one I’ll keep giving myself for years to come.
PS. Coming Soon! Beginner’s Guide to Microneedling Ebook and How-To Video! : )
Shop My Favorites!
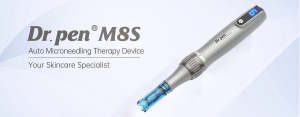
Dr. Pen M8S Use code KELLYDSHA for 20% off your order.
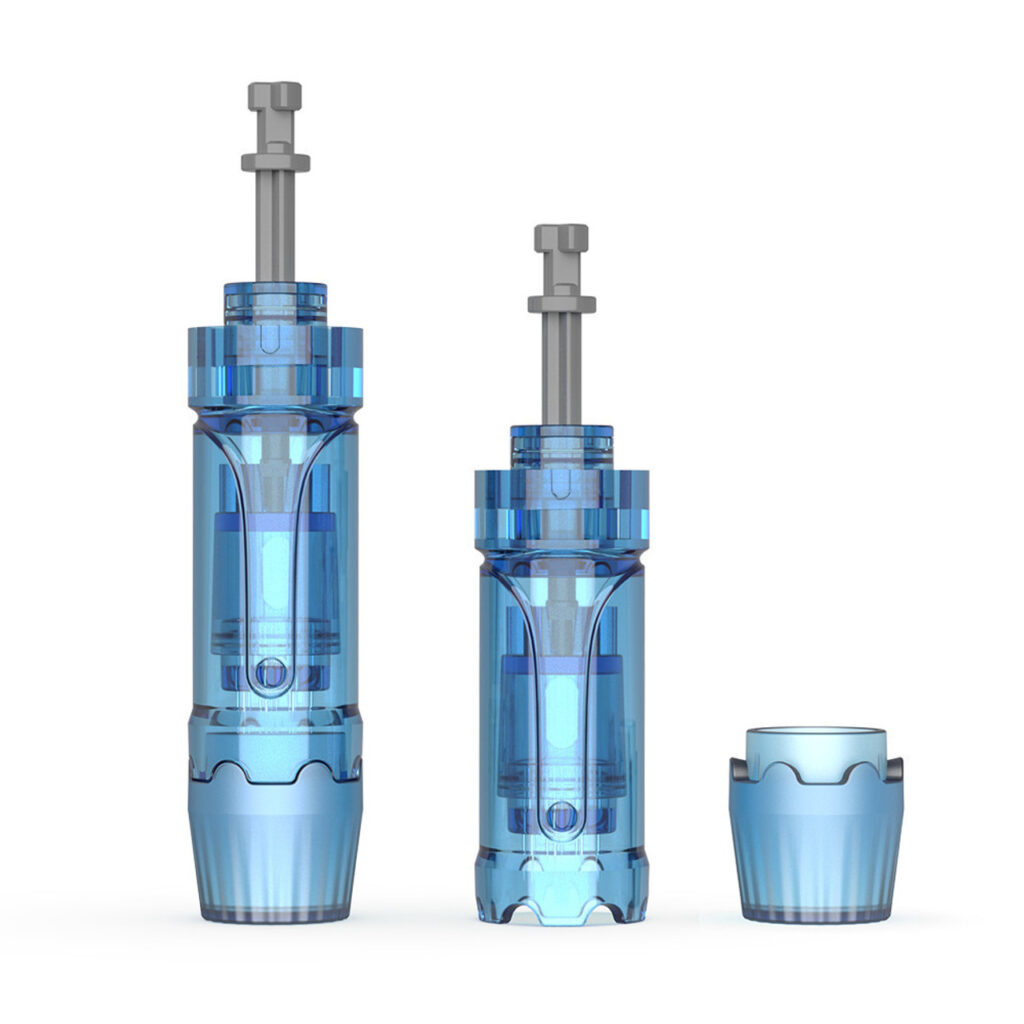
Dr. Pen M8S Cartridges – My favorite cartridges are the 18- or 24-pin cartridges. My daughter’s favorite is the 36-pin model, and my husband prefers the 42-pin ones.
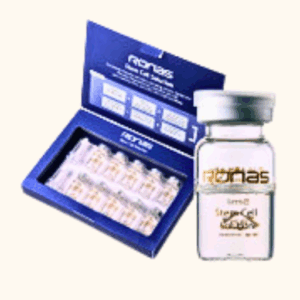
Ronas Stem Cell Serum – I’m thrilled that Dr. Pen now offers Ronas Stem Cell Serum! I used to purchase it from Korea, but now it’s more easily accessible. This is my go-to serum when microneedling because it gives my skin a bright, luminous glow. For only $49.99 (less with my discount code KELLYDSHA), you get TEN 5ML vials of serum!
Serums for Microneedling from Amazon
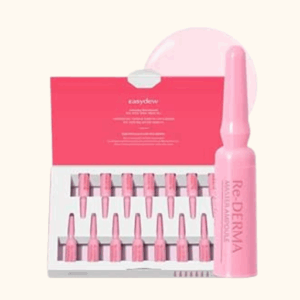

Hyaluronic acid is a great product to add to your microneedling cocktail, and my favorite is by the brand Cos De Baha. Unfortunately, as I write this post, Amazon only has the dropper version, so I will not be listing it here. Remember that it’s imperative to use only sterile products, such as pump versions or individual ampules and vials.
You can mix and match all of these serums to create a personalized blend of ingredients that cater to your skin’s specific needs. They can also be applied to your skin as part of your nightly skin care regimen without microneedling.
As a Dr. Pen and Amazon Affiliate, I earn a small commission on some purchases at no extra cost to you. Thank you for supporting my small business! As always, I only share products I use personally or recommend to clients and family. Please read my disclosure and privacy policy here.
Share Your Experience!
Please let me know in the comments if you’ve ever tried microneedling at home or professionally, and what your thoughts are on the results. Additionally, do you have a favorite serum to use in conjunction with microneedling? I love learning about new and different products. Thanks for sharing!
Pin It For Later!

Leave a Reply